Well now... if there is anything you can count on with kids... it's delays! LOL Luckily, this weekend I bribed them with a lot of new legos and video games to keep them busy while I finished some much needed sewing! ( and no, I'm not above bribing! ) LOL
So... let's get this cathedral window block party started! Here's my stack of the nine folded blocks (
from part ONE ) needed to make the front of my pillow... ( for
The Pillow Talk { Swap } )

This may be a silly tip, but... you should use thread that matches the base fabric ( as you'll see it )!
 I also took a quick shot of my machine settings incase you were interested in my stitch position or length... it's just centered and at a 3.0 in length.... very normal... no tricks! ( ooOohhh... yeah and if you have been following my blog, then you have noticed that I have went back to a Janome from my Phaff... unfortunately the Phaff was unable to make rag quilts... TONS of shattered needles... so... no good for biz! )
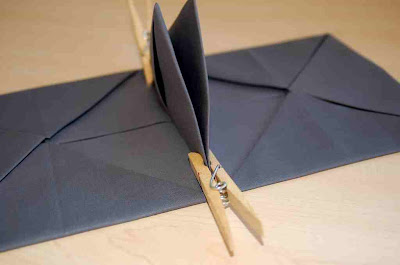
 Okay... to the sewing! Take two of your prepared blocks and align them side by side. Put together one folded triangle from each square back to back ( or wrong side to wrong side ).
 Then, carefully sew those two back to back triangles together following your ironed lines as a guide. I am a creature of habit, so... I always back stitch in the beginning and end of my stitch.
 Just keep adding your blocks together until you have 3 rows of 3 squares...
 Then... your going to add your rows together... again by putting one folded triangle from each square back to back ( or wrong side to wrong side ).
 In adding the rows together ( opposed to just squares ) I thought it was easier to place them wrong side to wrong side... then positioned the first folded triangles from each ajoined squares back to back... then start sewing... ( while back stitching ) :)
 I just simply pulled out the next set of triangles and kept sewing! Easy Peasy!!

Always... back stitching!! No room for holes in this baby!! LOL
 After you finish your first two rows... just add on the last one to make the front of your pillow!

As you can see... I take a quick measurement of my windows... and they look to be about 5 inches... so I'm going to cut my insert fabrics to 4 inches and start placing them into my windows :)
 I could stop here and leave the outside windows without an insert.... or
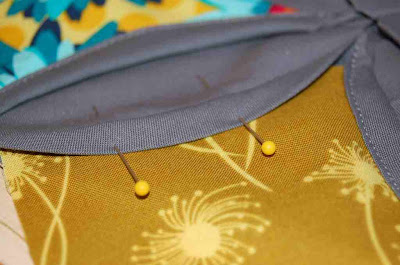
 or.... I can add them in ( which I did ) for more drama! Please note that the needles holding the insert fabric in place... have no other purpose then just that... until I get to that window... they just remain there keeping my insert fabric design in place.

Once I'm ready to start sewing my windows... I remove my needle that was holding down my insert fabric... then I center the insert fabric, so there is about 1/4 of inch difference between the window fabric and the insert fabric.
Then I just roll over the window fabric ( Kona Coal )... with the thickest part of the roll in the middle and secure it with the needle I used to hold my fabric in place earlier.
I position my my sewing machine needle at the top of the windows curve and either... ( use my quilters knot for security or back stitch a couple stitches )...
Then I simply start sewing... following the curve of the window!
 This is just another angle of my beginning stitch and how you'll be following the curve...
 Always... remember to back stitch at the end and then presto... one side sewn!

Simply... remove your needle and start the procedure again on the next side of your current window ;)
And... yes, you may find that your ending part of the window's curve may pop up while you are sewing the side down... just hold it in place with your finger... no biggie!

Soon... you'll be done with your first window and moving on to the next! It doesn't matter which window you start on... however, I do and would suggest moving onto another window that is connected... instead of hopping all over the place! LOL
 Another little tip... don't freak out by the lack of half a window on the outer edges... they sew just like the other windows, but only two sides!
 I do use two needles in those ones... just to tell them who's boss! And always be wary of your window corners!! make sure your rolling your base fabric over enough to cover your insert square... or it will look weird. ;)
 Pretty soon... you'll end up with this... a completed cathedral window pillow front! Now wasn't that simple??? They do take some time... but they are a very dramatic result!!
If you're wanting a quilt... just keep going...
if you're wanting a pillow... simply trim off your extra insert fabric on the sides of the pillow's front and attach the back as you would on any of your other pillows!! Easy Peasy!!


I hope you find this a helpful tool and good luck to you on all your pillow or quilt adventures!!
XO, Heather


No comments:
Post a Comment